
Guide to Interior Photography – Tips & Tricks by Darshan Chheda
Lit Up : Make the room / area lit up entirely to eliminate any dark areas in the picture.
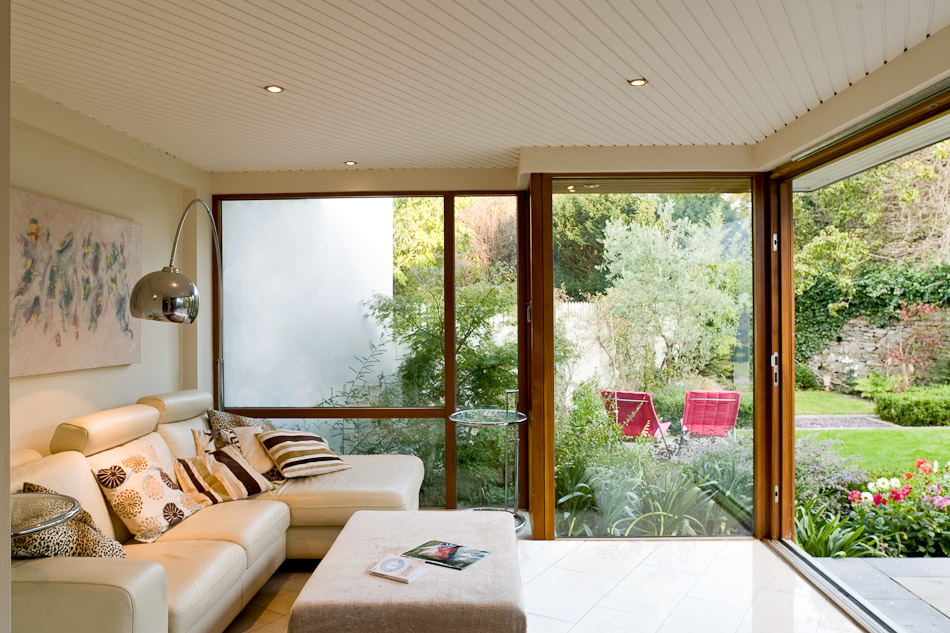
Natural Light : Use natural light as & when possible during daytime to create an ambiance. But be aware to use it appropriately for it can make burn out areas in your frame, like harsh sunlight from windows, which on other hand can be used it creatively as well.
Interior Lighting : Apart from natural light shots, interior lighting must also be used to showcase the glamour & grandeur of the room. Switch on all the possible lights in the room, unless, you want to be creative with shooting in a couple lights.
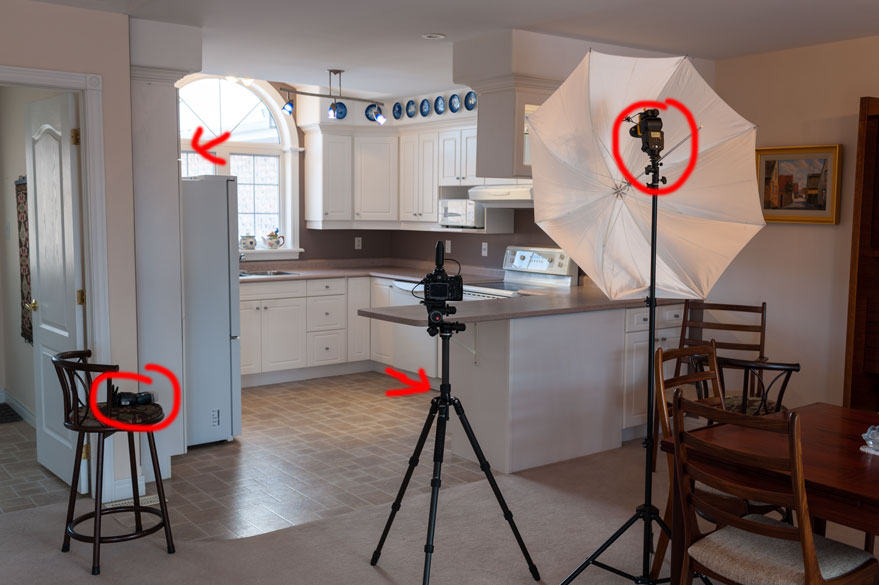 Strobes / Flash : Use flash or strobes for areas with less lighting available. Though, control flash light and ambient light appropriately as such that it doesn’t remove the charm of the place. Bounce the flash off ceiling / wall or use a diffuser to create soft & diffused light effect.
Tripod : Good, sturdy tripod is a must to be used, especially for low-lighting, for you never know when you get your camera shake, only to find it on your monitor screen after the shoot. Hence, tripod can let you take your shutter speeds to lowest levels to maintain the appropriate brightness & contrast in the picture while shooting in narrower apertures. It also let you go lower and higher than your possible reaches.
Perspective : It’s all about perspective after all, to get the best viewing angles so as to showcase the prime subject to viewers. While shooting at eye-level is the key to create good interior photographs, though, going low to cover a well-lit & designed ceiling or going high to cover a magnificent flooring, would all add up for the appealing picture. Similarly, getting a corner to cover the entire possible room or standing strategically to make a leading lines towards a drawing subject in the room, everything will compliment in making the place look beautiful. Creativity is the best thing to bring out a different perspective for eyes.
Arrange & Organise : The foremost thing to make interiors look good is to organise and arrange properly the different subjects in the room so as to make it look nice clean & tidy. Stack-up the objects and remove any clutter or style it to make it look pleasant than a mess. Arrange the furniture in a way which adds up to the aesthetic value of the room.
Composition : Compose your shot in a way where objects or other things don’t interfere with the primary visual focus area of the place. Respect verticals & horizontals and keep them true to your subjects with the help of in-camera grids. Though, positive creativity can be an exception.
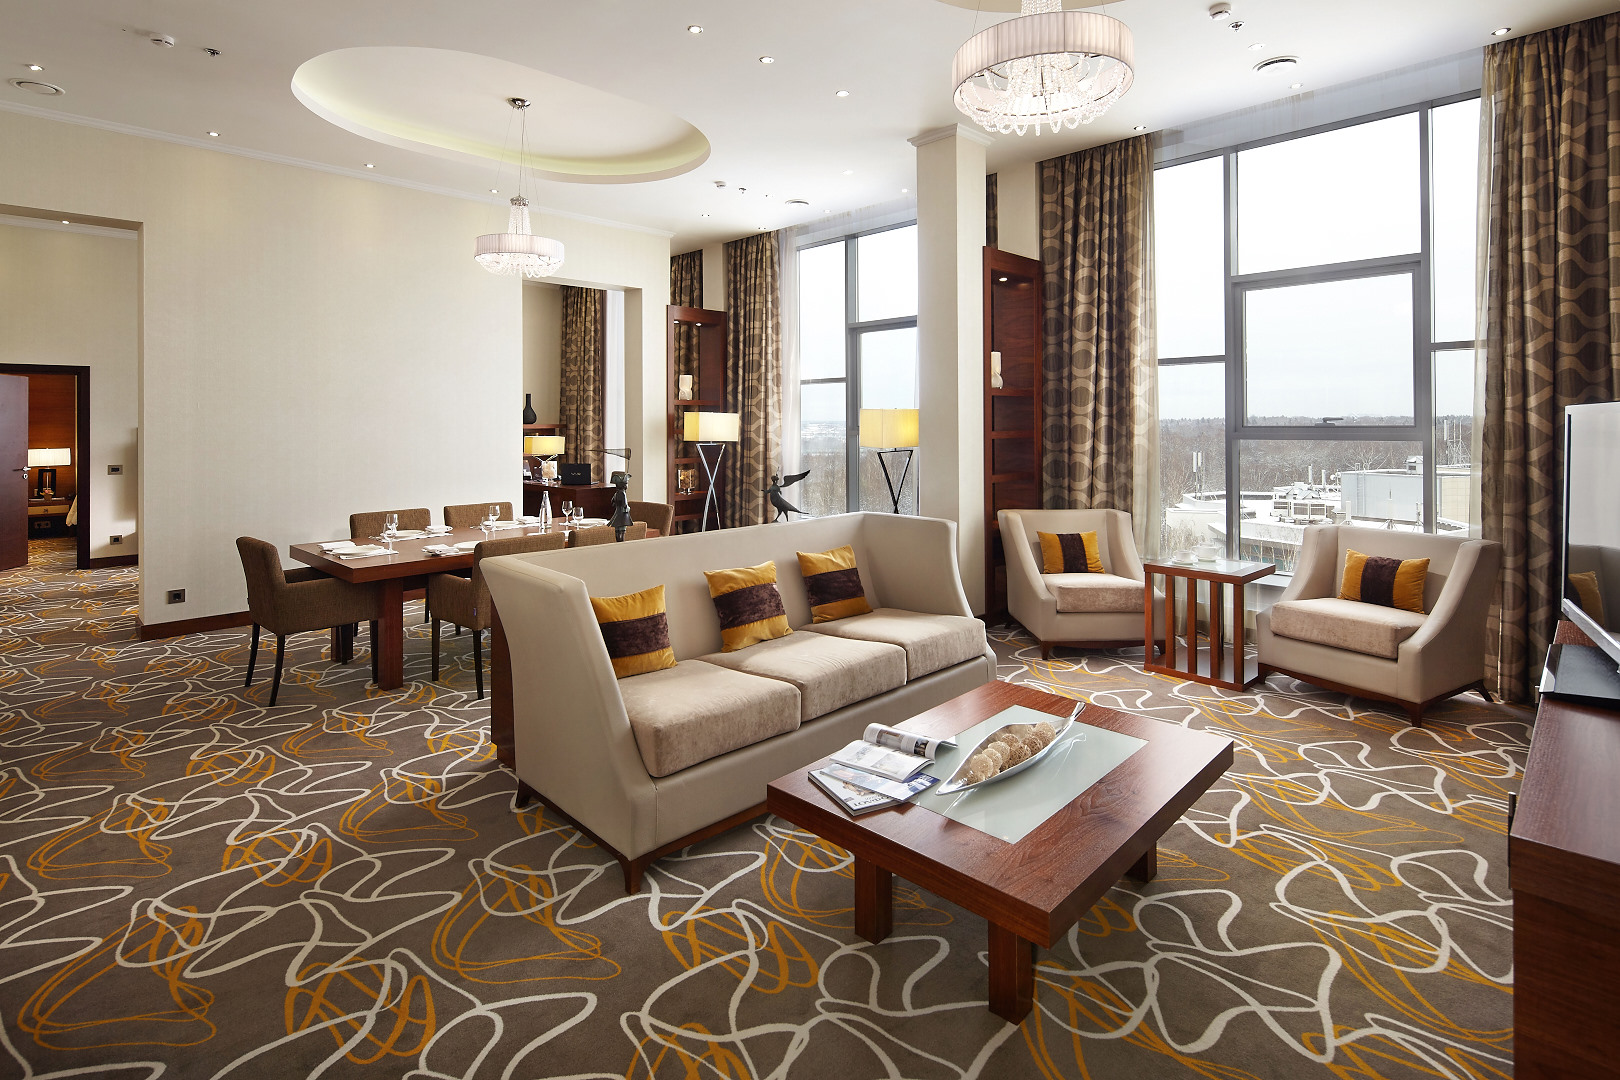
Balance : Strike a balance between your foreground and background as well as upper & bottom portions of the room. Using the background to show a connecting room is also a great way to give the viewer a sense of space. This will add interest and make the viewer feel like they can visualize walking through the home.
 Contrast : Make sure to develop some sort of contrast in the picture rather than making it flat. Composition of lighting and objects play an important role here.
Wide-Angle : Using wide angle lens is the best way to shoot interiors as it captures more room in a picture.
Tilt-Shift : Use tilt-shift lens to correct the converging verticals and bring them straight. It is very important for interior / exterior photography; although, it can be done with Photoshop as well.
Polariser : Use a Cl-Polariser filter to remove any unwanted reflections off tiles, laminates, glasses, etc.
ND Filter : Using ND filter can help control overly bright room or burned out patches, while keeping shutter speed & aperture as you desire.
HDR : Shoot multiple exposures of same frame for creating HDR images to give it more vibrant look. HDR images works best when outside view from the windows needs to be incorporated into an interior image.
White Balance : Use appropriate white balance for daylight, incandescent & fluorescent type of lighting to remove any colour casting.
ISO : Lower your ISO to eliminate any grains and noise in the otherwise far-better picture. Again, using a tripod will definitely assist in achieving desired lower ISO levels. Recommendation Value : 100 to 400.
Aperture : Narrow your aperture to make entire room sharper. Or, widen it to make a specific subject stand out in the room. Recommendation Value : f/8 onwards.
Shutter Speed : For busy places, shoot long exposures on tripod to make unwanted elements invisible. Recommendation Value : as per available light.
 Monochrome : Shooting in black-&-white can have its fill of adding up the aesthetic appeal of the place. Though, it can be done in post-processing.
RAW : Shoot only RAW as it can correct some of the major mistakes in entire shoot.
Outdoors : Don’t forget to shoot the place from outside, if possible, to make the shoot complete.
Disturbance : Make sure obstructing objects & other causes of disturbance, like trash, clothes, footwears, etc. are removed from the frame before taking the shot. This will make the show home more inviting and warm. Plump up sofa cushions and straighten bed covers, curtains and blinds. Also, see that no human figures are captured in entire frame; this includes mirror reflections & shadows as well. Ensure that all moving objects are put to stop, like fans, curtains, toys, etc.
Cleanliness : Entire area / room to be photographed, should be clean of any garbage, dust, dirt, soil, water & paint marks to make it look nice & pleasant so as to increase its aesthetic value. Also, all sorts of glasses, screens & windows must be wiped spotlessly clean to give it a shine in pictures. While shooting bathrooms, they must be wiped of all water from floorings, doors, mirrors, sinks, curtains, tubs, wash-basins, etc.
Post-Processing : It is really important to retouch all the photos to get an edge over the actual ones. Post-processing improves the picture quality in wide range and can cover up for any loss, except for few.
Fullhdfilmizlesene ile en yeni vizyon filmler Full HD ve ücretsiz film sizlerle. Orijinal film arşivimizle en kaliteli film izle fırsatı sunuyoruz. Patrick Pilgrim